Linux introduction guide
This page contains a short introduction to Linux, a Linux chest sheet, and some links to resources for learning more about Linux.
Much of this material is from the Linux introduction part of the “Introduction to HPC2N and Kebnekaise” course that HPC2N usually runs twice yearly.
HPC2N’s supercomputer “Kebnekaise”, as well as most HPC centers supercomputers run Linux.
“Kebnekaise” runs Linux Ubuntu, currently (spring 2024) Ubuntu 20.04.
What is Linux
Linux is a family of open-source Unix-like operating systems based on the Linux kernel, an operating system kernel first released on September 17, 1991, by Linus Torvalds.
An operating system is the software that sits underneath all of the other software on a computer, managing the computer’s hardware (CPU, GPU, memory, storage…) and taking care of the connections between your other software and the hardware.
Linux is typically packaged as a Linux distribution, which includes the kernel and supporting system software and libraries, many of which are provided by the GNU Project.
There are many Linux distribuitions, including Ubuntu, Debian, Fedora, Gentoo, and many others. Many distributions are free and open source, but there are also commercial distributions, like Red Hat Enterprise and SUSE.
Desktop Linux distributions include a desktop environment, like GNOME, MATE, KDE Plasma, Xfce, Unity, or many others. A window manager together with applications written using a widget toolkit are generally responsible for most of what the user sees.
In addition, a windowing system of some sort (X11, Wayland) interfaces directly with the underlying operating system and libraries, providing support for graphical hardware, pointing devices, and keyboards. The window manager generally runs on top of this windowing system.
While the use of Linux on desktop is only 2-3%, the vast majority of web servers (>96%), most mobile devices (Android is based on the Linux kernel), and all supercomputers on the Top500 list run Linux.
There is much more information about Linux on Wikipedia.
Command line
The command line is an interface for typing commands directly to a computer’s operating system. It is a user interface that is navigated only with the keyboard, by typing commands at a prompt, instead of by clicking with a mouse or similar.
The Command Line Interface (CLI) is available in all operating systems, including Windows, Linux and macOS, but it is most commonly associated with Linux.
In Unix or Linux, the prompt may be shown as “%” or “>” depending on the shell.
The opposite of a CLI is a GUI (Graphical User Interface), which generally uses a mouse or similar for navigating.
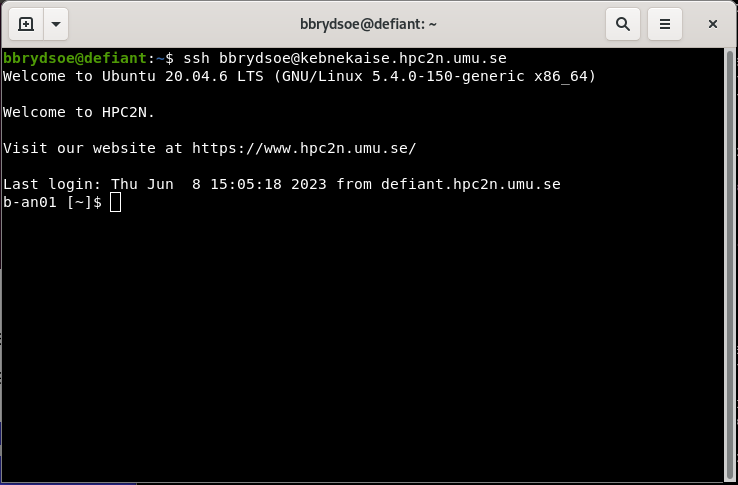
Command line interfaces often gives access to many more capabilities than the graphical user interface does, and it is also practical and normally faster in situations where you login with a terminal on a remote system, like Kebnekaise.
The picture above shows a terminal window where I am logged into Kebnekaise (from my desktop defiant).
Warning
You will find that many/most commands in this tutorial are prefaced with either $ or b-an01 [~]$, or something like b-an01 [~/mytestdir/testdir1]$.
This is the prompt from the computer system, where $ just is the default (bash) prompt, and the others are the actual prompt you will see when logged into the regular login node of Kebnekaise (home directory versus a sub directory that in this case is named testdir/testdir1).
You can see this prompt in the picture a bit further up on the page.
Do NOT copy this prompt if you are copying code snippets. It should not be included in the command.
Navigating the File System
This section is going to be a high-level talk about the Linux filesystem concepts, not a low-level description of filesystem types.
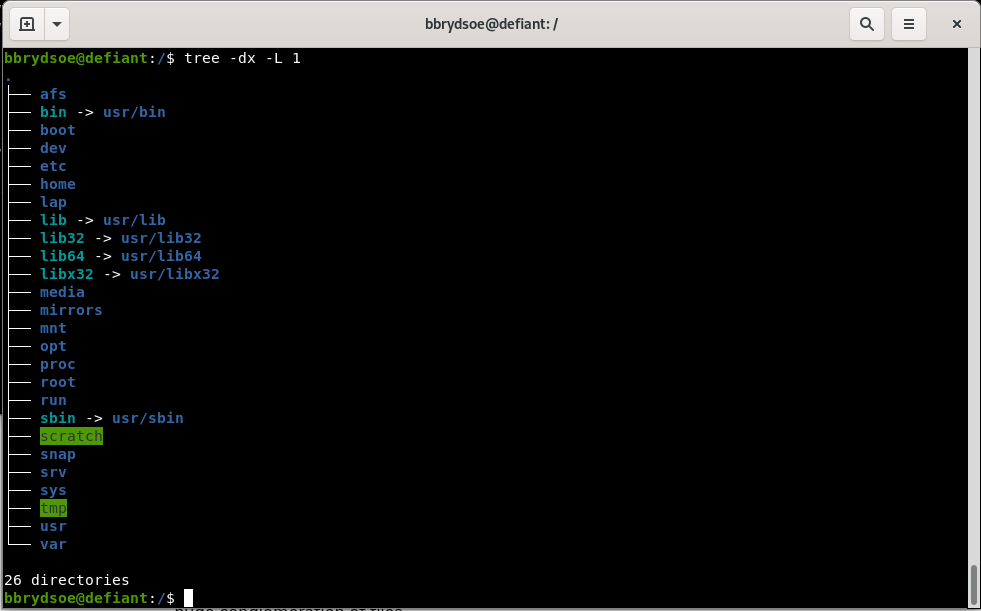
The Linux filesystem directory structure starts with the top root directory, which is shown as /. Below this are several other standard directories. Of particular interest are usr/bin, home, usr/lib, and usr/lib64. A common directory which you will also often find is usr/local/bin.
The picture on the right shows typical subdirectories under / (note that the command ‘tree’ does not work on Kebnekaise). Some of the directories have a symbolic link to a different name - this is often done to make it quicker to write, but can also be for compatibility reasons since some software have hardcoded paths.
- usr/bin: contains (most) of the system-specific binaries
- usr/local/bin: non-system binaries. often locally compiled/maintained packages
- home: where the home directories of the users of the system are located
- usr/lib: kernel modules and shared library images needed to boot the system and run commands in the root filesystem
- usr/lib64: same as /lib, just for 64-bit libraries
User-installed binaries are often located in /opt.
Kebnekaise
At Kebnekaise, most of the software you are using will be organized as “modules” which needs to be loaded before using. You should generally not use the binaries from the OS for compilers etc. See the section about modules.
ls - listing files/directories
The ls command is used to list files. If you just give the command “ls” with no flags it will list all files in the current directory except for hidden files.
This way you can to list files/subdirectories for any directory, but the default one is the one you are currently standing in.
Some examples:
ls /lists contents of the root directoryls ..lists the contents of the parent directory of the currentls ~lists the contents of your user home directoryls *lists contents of current directory and subdirectories
Commonly used flags:
-d */lists only directories-alists content including hidden files and directories-llists content in long table format (permissions, owners, size in bytes, modification date/time, file/directory name)-lhadds an extra column to above representing size of each file/directory-tlists content sorted by last modified date in descending order-trlists content sorted by last modified date in ascending order-Rlists contents recursively in all subdirectories-slist files with their sizes-Ssort files/directories by size in descending order-Srsort files/directories by size in ascending order
To get more flags, type ls --help or man ls in the terminal to see the manual.
The output for a few of the flags, for a directory with two subdirectories and some files
b-an01 [~/mytestdir]$ ls
myfile.txt  myotherfile.dat  testdir1/  testdir2/

b-an01 [~/mytestdir]$ ls -a
./  ../  myfile.txt  myotherfile.dat  testdir1/  testdir2/

b-an01 [~/mytestdir]$ ls -l
total 16
-rw-r--r-- 1 bbrydsoe folk   90 Jun  9 14:19 myfile.txt
-rw-r--r-- 1 bbrydsoe folk  101 Jun  9 14:19 myotherfile.dat
drwxr-xr-x 2 bbrydsoe folk 4096 Jun  9 14:14 testdir1/
drwxr-xr-x 2 bbrydsoe folk 4096 Jun  9 14:19 testdir2/

b-an01 [~/mytestdir]$ ls -la
total 24
drwxr-xr-x  4 bbrydsoe folk  4096 Jun  9 14:19 ./
drwxr-xr-x 49 bbrydsoe staff 4096 Jun  9 14:10 ../
-rw-r--r--  1 bbrydsoe folk    90 Jun  9 14:19 myfile.txt
-rw-r--r--  1 bbrydsoe folk   101 Jun  9 14:19 myotherfile.dat
drwxr-xr-x  2 bbrydsoe folk  4096 Jun  9 14:14 testdir1/
drwxr-xr-x  2 bbrydsoe folk  4096 Jun  9 14:19 testdir2/

b-an01 [~/mytestdir]$ ls -lah
total 24K
drwxr-xr-x  4 bbrydsoe folk  4.0K Jun  9 14:19 ./
drwxr-xr-x 49 bbrydsoe staff 4.0K Jun  9 14:10 ../
-rw-r--r--  1 bbrydsoe folk    90 Jun  9 14:19 myfile.txt
-rw-r--r--  1 bbrydsoe folk   101 Jun  9 14:19 myotherfile.dat
drwxr-xr-x  2 bbrydsoe folk  4.0K Jun  9 14:14 testdir1/
drwxr-xr-x  2 bbrydsoe folk  4.0K Jun  9 14:19 testdir2/

b-an01 [~/mytestdir]$ ls -latr
total 24
drwxr-xr-x 49 bbrydsoe staff 4096 Jun  9 14:10 ../
drwxr-xr-x  2 bbrydsoe folk  4096 Jun  9 14:14 testdir1/
drwxr-xr-x  2 bbrydsoe folk  4096 Jun  9 14:19 testdir2/
-rw-r--r--  1 bbrydsoe folk    90 Jun  9 14:19 myfile.txt
-rw-r--r--  1 bbrydsoe folk   101 Jun  9 14:19 myotherfile.dat
drwxr-xr-x  4 bbrydsoe folk  4096 Jun  9 14:19 ./

b-an01 [~/mytestdir]$ ls *
myfile.txt  myotherfile.dat

testdir1:
file1.txt  file2.sh  file3.c  file4.dat

testdir2:
file1.txt  file2.txt  file3.c

b-an01 [~/mytestdir]$ cd testdir1
b-an01 [~/mytestdir/testdir1]$ ls -l
total 16
-rw-r--r-- 1 bbrydsoe folk 24 Jun  9 14:16 file1.txt
-rw-r--r-- 1 bbrydsoe folk 52 Jun  9 14:16 file2.sh
-rw-r--r-- 1 bbrydsoe folk 82 Jun  9 14:17 file3.c
-rw-r--r-- 1 bbrydsoe folk 40 Jun  9 14:17 file4.dat

b-an01 [~/mytestdir/testdir1]$ ls -ls
total 16
4 -rw-r--r-- 1 bbrydsoe folk 24 Jun  9 14:16 file1.txt
4 -rw-r--r-- 1 bbrydsoe folk 52 Jun  9 14:16 file2.sh
4 -rw-r--r-- 1 bbrydsoe folk 82 Jun  9 14:17 file3.c
4 -rw-r--r-- 1 bbrydsoe folk 40 Jun  9 14:17 file4.dat
The “drwxr-xr-x” and “-rw-r--r--” are examples of permissions. The prefex d means is it a directory. A “-” means no permission for that. There are three groups: owner, group, and all. Note that “r” is for read, “w” is for write, and “x” is for execute.
chmod - change permissions
The command chmod is used to change permissions for files and directories.
There are three types of permission groups
- owners: these permissions will only apply to owners and will not affect other groups.
- groups: you can assign a group of users specific permissions, which will only impact users within the group. The members of your storage directory belongs here.
- all users: these permissions will apply to all users, so be careful with this.
There are three kinds of file permissions
- Read (r): This allows a user or a group to view a file (and so also to copy it).
- Write (w): This permits the user to write or modify a file or directory.
- Execute (x): A user or a group with execute permissions can execute a file. They can also view a subdirectory.
The permissions for a file, directory, or symbolic link has 10 “bits” and looks similar to this:
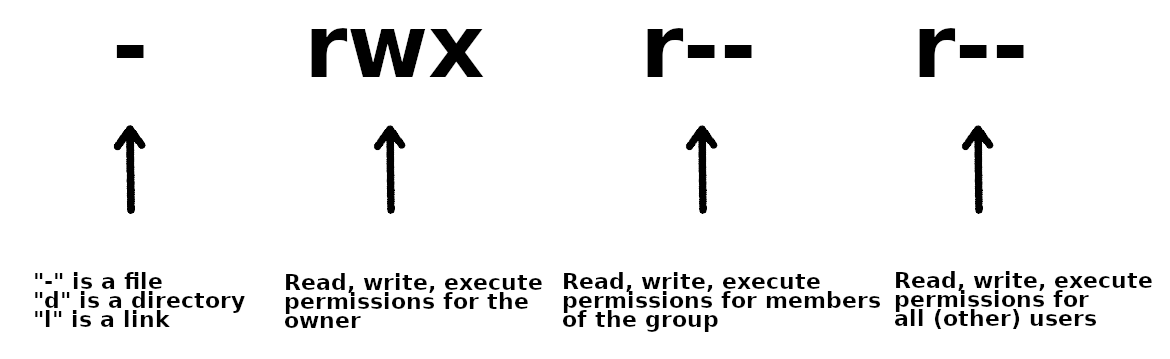
As shown, the first bit can be “-” (a file), “d” (a directory), or “l” (a link).
The following group of 3 bits are for the owner, then the next 3 for the group, and then the last 3 for all users. Each can have the r(ead), w(rite), and (e)x(ecute) permission set.
To change permissions, here are some examples
- owner
- chmod +rwx FILE/DIR to add all permissions of a file with name FILE or a directory with name DIR
- chmod -rwx FILE/DIR to remove all permissions from a file with name FILE or a directory with name DIR
- chmod +x FILE to add executable permissions
- chmod -wx FILE to remove write and executable permissions
- group
- chmod g+rwx FILE to add all permissions to FILE
- chmod g-rwx FILE to remove all permissions to FILE
- chmod g+wx FILE to give write and execute permissions to FILE
- chmod g-x FILE to remove execute permissions to FILE
- others
- chmod o+rwx FILE to add all permissions to FILE
- chmod o-rwx FILE to remove all permissions to FILE
- chmod o+w FILE to add write permissions to FILE
- chmod o-rwx DIR to remove all permissions to DIR
- all
- chmod ugo+rwx FILE/DIR to add all permissions for all users (owner, group, others) to file named FILE or directory named DIR
- chmod a=rwx FILE/DIR same as above
- chmod a=r DIR give read permissions to all for DIR
chown - change ownership
To change ownership of a file or directory, use the command chown.
Examples
chown USERNAME FILEthe user with USERNAME becomes the new owner of FILEchown USERNAME DIRECTORYthe user with USERNAME becomes the new owner of DIRECTORY (but not any subdirectories)chown USERNAME:folk DIRECTORYthe user ownership is changed to USER and the group ownership to group “folk” for the directory DIRECTORYchown :folk DIRECTORYthe group ownership is changed to the group “folk” for the directory DIRECTORYchown -R USERNAME:folk DIRECTORYthe user ownership is changed to USERNAME and the group ownership is changed to group “folk” for the directory DIRECTORY and all subdirectories
Warning
As default, chown does not generate output on success and returns zero.
Create and remove directories/files
This section contains a few examples of how to work with files and directories through command line interface.
- mkdir DIR: Create a directory DIR
- rm -rf DIR: Remove a directory DIR. The flag “-r” means recursively and “-f” means do so without asking for each file and subdirectory. Useful, but dangerous. Be careful!
- cd: Go to your home directory ($HOME)
- cd DIR: Change directory to DIR
- cd ..: Change directory to the parent directory of the current directory
- touch FILE: create an empty file with the name FILE
You also user “rm” to remove files;
The command pwd tells you the current directory path.
Creating directories, changing directories, removing directory and file
b-an01 [~]$ mkdir mytestdir
b-an01 [~]$ cd mytestdir/
b-an01 [~/mytestdir]$ mkdir testdir1
b-an01 [~/mytestdir]$ mkdir testdir2
b-an01 [~/mytestdir]$ mkdir testdir3
b-an01 [~/mytestdir]$ rm -rf testdir3
b-an01 [~/mytestdir]$ cd testdir1
b-an01 [~/mytestdir/testdir1]$ touch file1.txt
b-an01 [~/mytestdir/testdir1]$ touch file2.sh
b-an01 [~/mytestdir/testdir1]$ touch file3.c
b-an01 [~/mytestdir/testdir1]$ touch file4.dat
b-an01 [~/mytestdir/testdir1]$ touch file5.txt
b-an01 [~/mytestdir/testdir1]$ rm file5.txt
b-an01 [~/mytestdir/testdir1]$
b-an01 [~/mytestdir/testdir1]$ cd ..
b-an01 [~/mytestdir]$ cd testdir2/
b-an01 [~/mytestdir/testdir2]$
cp - copy files/directories
This command is used to copy files or directories.
- cp myfile.txt DIR/: copy the file “myfile.txt” to the directory DIR
- cp DIR1/ DIR2/: copy the directory DIR1 into the directory DIR2 (Note: overwrites existing files with same name)
- cp -R DIR1/ DIR2/: copy the directory DIR1 and all subdirectories into the directory DIR2.
mv - rename files/directories
The command mv is used to rename files and directories.
- mv file1.txt file2.txt: renames file1.txt to file2.txt
- mv DIR1/ DIR2/: renames directory DIR1 to directory DIR2/
Note
mv complains if there is already a file/directory with the new name. You can force the renaming with “-f” at the cost of the disappearence of the file that previously held the name.
Symbolic links
Symbolic links are also called soft links, or just symlinks. It is a pointer to another file or directory.
- It is useful both for ease
- you avoid using a long path each time you change to a directory, like your project directory
- as well as to avoid changing hard links within other scripts or programs. This is good if you for instance install a program or use a script that assumes the library it uses is called libcoolness.a and not libcoolness.2.0.a. You can then just update the symlink instead of renaming the library or updating potentially many instances where it is mentioned in the program.
Command:
Example
This creates a symbolic link named “myproj” in your home directory, pointing to /proj/nobackup/hpc2nxxxx-yyy/mydir:
Redirection
Usually, standard input comes from the keyboard etc. and the standard output goes to the screen. There is also standard error. All of these can be redirected with Linux commands.
- > redirects the output of some command
- Example, output of “ls” to a file:
ls > test.dat
- Example, output of “ls” to a file:
- >> concatenate the output of some command to the content of a file
- Example, adds the output of ls to the end of a file “test.dat”:
ls >> test.dat
- Example, adds the output of ls to the end of a file “test.dat”:
- < changes the standard input
- 2> redirects the standard error:
- Example, redirect the error that is thrown from your program named “myprogram” to a file “error.log”:
./myprogram 2> error.log
- Example, redirect the error that is thrown from your program named “myprogram” to a file “error.log”:
- 2>&1 redirects both standard output and standard error
- Example, redirect output and errors from your program to the same file:
./myprogram > logfile 2>&1
- Example, redirect output and errors from your program to the same file:
Some more examples
Append the contents of file 1 to file2
Append some text to a file called file2
Another way to append some text to a file
Adding longer blocks of text to a file, using the command line.
-
Open the file for writing
-
Add some text:
-
To save the changes press CTRL-d i.e. press and hold CTRL and press d.
Pipes
Pipes are used when you want to take the output of one command and use it as input for another command.
Here follows some examples:
Find the instances of the word ‘string’ in file.txt and count them
Find the lines with instances of ‘string’ in file.txt and output them to file.out
Find the lines with instances of ‘string’ in file.txt and append them to file.out
Exporting variables
Environment variables store data that is used by the operating system and other programs.
Some are intrinsic to the operating system, some for a specific program/library/programming language, and some are created by the user.
The variables can both be used in scripts and on the command line. Usually you reference them by putting a special symbol in front of or around the variable name. By convention, environment variable names are in UPPER CASE.
Examples:
- $HOME Your home directory
- $PWD This variable points to your current directory
- $LD_LIBRARY_PATH a colon-separated list of directories that the dynamic linker should search for shared objects before searching in any other directories
- $OMP_NUM_THREADS Number of OpenMP threads
- $PYTHONPATH Path to the directory where your Python libraries and packages are installed
Some environment variables need to be exported in order to be used
This is how you set the environment variable VARIABLE to value:
Some examples:
Warning
The environment variable only retains the value you have set for the duration of the session. When you open a new terminal window or login again, you need to set it again.
To avoid that, add it to your .bashrc file, but only do so if it should truly be persisten across many sessions (like adding a new directory to search to LD_LIBRARY_PATH for instance).
Quickly add a new directory to LD_LIBRARY_PATH in tour .bashrc
Change /your/custom/path/ to the actual path to the directory for your library.
Editors
Some editors are more suited for a GUI environment and some are more suited for a command line environment.
Command line
These are all good editors for using on the command line:
They are all installed on Kebnekaise.
Of these, vi/vim as well as emacs are probably the most powerful, though the latter is better in a GUI environment. The easiest editor to use if you are not familiar with any of them is nano.
Nano
- Starting “nano”: Type
nanoFILENAME on the command line and pressEnter. FILENAME is whatever you want to call your file. - If FILENAME is a file that already exists,
nanowill open the file. If it dows not exist, it will be created. - You now get an editor that looks like this:
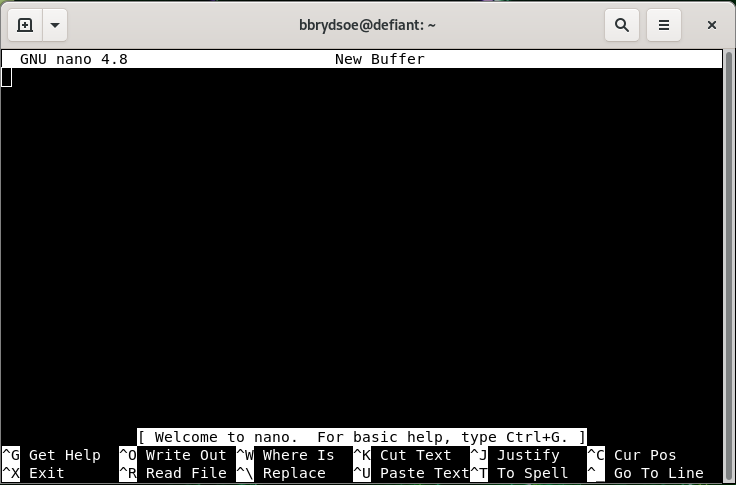
- First thing to notice is that many of the commands are listed at the bottom.
- The ^ before the letter-commands means you should press CTRL and then the letter (while keeping CTRL down).
- Your prompt is in the editor window itself, and you can just type (or copy and paste) the content you want in your file.
- When you want to exit (and possibly save), you press CTRL and then x while holding CTRL down (this is written CTRL-x or ^x).
nanowill ask you if you want to save the content of the buffer to the file. After that it will exit.
There is a manual for nano here.
GUI
If you are connecting with ThinLinc, you will be presented with a graphical user interface (GUI). From there you can either open a terminal window/shell (Applications -> System Tools -> MATE Terminal) or you can choose editors from the menu by going to Applications -> Accessories. This gives several editor options, of which these have a graphical interface:
- Text Editor (gedit)
- Pluma - the default editor on the MATE desktop environments (that Thinlinc runs)
- Atom - not just an editor, but an IDE
- Emacs (GUI)
- NEdit “Nirvana Text Editor”
If you are not familiar with any of these, a good recommendation would be to use Text Editor/gedit.
Text Editor/gedit
- Starting “gedit”: From the menu, choose Applications -> Accessories -> Text Editor.
- You then get a window that looks like this:
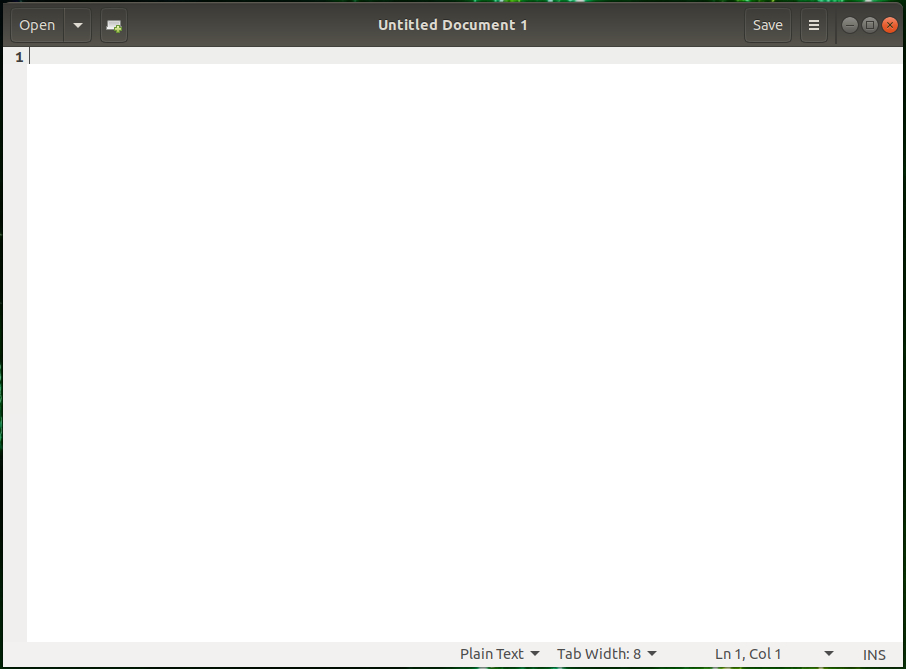
- You can open files by clicking “Open” in the top menu.
- Clicking the small green file icon with a green plus will create a new document.
- Save by clicking “Save” in the menu.
- The menu on the top right (the three horizontal lines) gives you several other options, including “Find” and “Find and Replace”.
Data Handling
This section will briefly cover compressing/decompressing files/directories, transferring files, and logging in. There will be links to other sections which cover the material in more detail.
Compressing and decompressing
Compressing files are done with utilities like gzip, bzip2, or zip.
Archiving
Archiving is generally done with tar.
A tarball is a commonly used name to refer to an archive file in the tar (Tape Archive) format.
A tarball can be compressed with something like gzip or bzip2.
tar [-options] <name of the tar archive> [files or directories which to add into archive]

Basic options:

    -c, --create — create a new archive;
    -a, --auto-compress — additionally compress the archive with a compressor which will be automatically determined by the file name extension of the archive. If the archive's name ends with *.tar.gz then use gzip, if *.tar.xz then use xz, *.tar.zst for Zstandard etc.;
    -r, --append — append files to the end of an archive;
    -x, --extract, --get — extract files from an archive;
    -f, --file — specify the archive's name;
    -t, --list — show a list of files and folders in the archive;
    -v, --verbose — show a list of processed files.
Here follows some examples:
More information in the main Archiving and compressing section.
File transfer and syncing
There are several possible ways to transfer files and data to and from HPC2N’s systems: scp, sftp, rsync…
Warning
FTP is not permitted due to security problems!
SCP
SCP (Secure CoPy) is a simple way of transferring files between two machines that use the SSH (Secure SHell) protocol.
SFTP
SFTP (SSH File Transfer Protocol or sometimes called Secure File Transfer Protocol) is a network protocol that provides file transfer over a reliable data stream.
From a local system to a remote system
enterprise-d [~]$ sftp user@kebnekaise.hpc2n.umu.se
Connecting to kebnekaise.hpc2n.umu.se...
user@kebnekaise.hpc2n.umu.se's password:
sftp> put file.c C/file.c
Uploading file.c to /home/u/user/C/file.c
file.c                          100%    1    0.0KB/s   00:00
sftp> put -P irf.png pic/
Uploading irf.png to /home/u/user/pic/irf.png
irf.png                         100% 2100    2.1KB/s   00:00
sftp>
From a remote system to a local system
rsync
rsync is a utility for efficiently transferring and synchronizing files between a computer and a storage drive and across networked computers by comparing the modification times and sizes of files.
Recursively sync files from one remote directory to a local directory. Also preserve symbolic links and time stamps, and allows resume of partially transferred files on restart
Recursively sync a local directory to a remote destination directory, preserving owners, permission, modification times, and symbolic links
Much more information and examples in the File transfer section.
Connecting with ssh
The ssh command is used for connecting to a remote computer.
Some useful examples:
Connecting to Kebnekaise and enabling graphical display
Note that you need to have an X11 server like Xming or Cygwin on Windows, XQuartz on macOS (included on Linux) to open a graphical display.
Tip
If you are using a graphical display, then we are strongly recommending ThinLinc. Read more about using that to access HPC2N in the ThinLinc connection guide.
More information about accessing Kebnekaise in the section about Accessing.
More advanced topics
This section will look at finding patterns (grep, awk, wild cards, regular expressions) and scripting.
Finding patterns
Here you will find descptions on how to search for files with specific patterns.
grep
This command searches for patterns in text files.
awk
This command finds patterns in a file and can perform arithmetic/string operations.
Search for the pattern ‘snow’ in the file FILE and print out the first column
Wild cards
Wild cards are useful ‘stand-ins’ for one or more character or number, that you can use for instance when finding patterns or when removing/listing all files of a certain type.
Wild cards are also called globbing patterns.
- ? represents a single character
- * represents a string of characters (0 or more)
- [ ] represents a range
- { } the terms are separated by commas and each term must be a wildcard or exact name
- [!] matches any character that is NOT listed between the [ and ]. This is a logical NOT.
- ** specifies an “escape” character, when using a subsequent special character.
Warning
You may need quotation marks as well around some wildcards.
Some examples of use of wildcards
This matches myfile0.txt, myfile1.txt,… for all letters between a-z and numbers between 0-9.
This matches red, rad, ronald, … anything starting with r and ending with d, including rd.
This matches rack, rick, rock.
This matches ada, afa, aja, … and any three letter word that starts with an a and ends with an a and has any character d to j in between.
This matches a range of numbers from 0 to 9.
This specifies to copy any files ending in .dat, .c, and .pdf to the user’s homedirectory. No spaces are allowed between the commas, etc.
This will remove all files named thisfile*, except those that has an 8 at that position in it’s name.
Regular Expressions
Regular Expressions are a type of globbing patterns that are used when you are working with text.
Regular Expressions can be used with programs like grep, find and many others.
Note
If your regular expressions does not do as you expect, you may need to use single quotation marks around the sentence and you may also have to use backslashes on every single special character.
Some common examples of regular expressions:
- . matches any single character. Same as ? in standard wildcard expressions.
- \ is used as an “escape” character for a subsequent special character.
- .* is used to match any string, equivalent to * in standard wildcards.
- * the proceeding item is matched zero or more times. ie. n* will match n, nn, nnnn, nnnnnnn but not na or any other character.
- ^ means “the beginning of the line”. So “^a” means find a line starting with an “a”.
- $ means “the end of the line”. So “a$” means find a line ending with an “a”.
- [ ] specifies a range. Same as for normal wildcards. This is an ‘or’ relationship (you only need one to match).
- | This wildcard makes a logical OR relationship between wildcards. You can thus search something or something else. You may need to add a ‘' before this command to avoid the shell thinking you want a pipe.
- [^] This is the equivalent of [!] in standard wildcards, i.e. it is a logical “not” and will match anything not listed within the square brackets.
Example
This command searches the file myfile for lines starting with an “s” and ending with an “n”, and prints them to the standard output.
Scripting
Scripting is used to perform complex or repetitive tasks without user intervention. All Linux commands can be used in a script including wild cards.
The most common reason for making a script is probably to avoid writing the same command again and again.
Note
If it is just a one-line command you want to do again and again, then ‘alias’ is more suited for this.
Simple example of a script ‘analysis.sh’
This script can be executed with ./analysis.sh (remember to check that the permission for executing a script as user is set).
To change the permissions to execute a script (here named analysis.sh), for just the user, you could do:
The above script can then be executed with
For more examples of (more useful) scripts, see for instance this list of 25 Easy Bash Script Examples.
Alias
You will often have to write the same command again and again. If it is a longer command, it is reducing your productivity having to repeat it. Then you can use the alias command to create an ‘alias’ for your command.
To see the currently definted aliases, execute the ‘alias’ command:
Example
This is how it might look when you run alias:
As an example, this means that if you type ‘dir’ the actual command that is executed is ‘ls -lAF’.
In order to create a new alias, you could write:
Warning
The alias will only be valid in that shell, and only until you logout. Next time you will have to issue the ‘alias’ command again, unless you add it to either your .bashrc or .bash.profile file.
Adding a new alias to the .bashrc file, using ‘nano’ editor
-
Open the file:
nano ~/.bashrc -
Inside the editor, scroll down to where your aliases are. If you do not have any, just add them at the end, like this
#My custom aliases alias c="clear" alias ll="ls -alF" # Colourize ls output alias ls='ls --color=auto' # Colourize grep output alias grep='grep --color=auto' # Easily list my SLURM batch jobs alias jobs='squeue -u $USER' # Find all entries starting with d in the output from the ls -lahrt command alias ldir=’ls -lahrt | egrep "^d"’ - Save and Exit the file:
CTRL-x(Press CTRL and hold it down while pressing x). Answer ‘Y’ to save. - Next time you start a shell or after a new login your new alias is available. To make it available immediately, run
Hints and tricks
This section contains some hints that might make working with Linux easier.
Short-cuts on the CLI
CTRL-SOMEKEY refers to pressing down the CTRL key and then another key while continuing to hold down CTRL.
Examples:
- CTRL-a: Go to the beginning of the line
- CTRL-e: Go to the end of the line
- CTRL-l: Clear the terminal
- TAB: Auto-complete (i.e. start write a command or file name and then press TAB to auto-complete, if possible)
- ARROW-UP: Pressing the arrow-up key repeatedly will let you cycle through recent commands
- CTRL-r: you will get a prompt to write text to search in the list of recent commands. The list is saved in
.bash.historyin your $HOME.
Misc
- Write ‘clear’ to clear the terminal
- write ‘history’ to see a list of the most recent commands written in the terminal
- You can change the number of saved commands by setting the environment variable HISTSIZE in your
.bashrc filein your home directory. - Example: Open
.bashrcwithnano. Somewhere (at the end for instance) add:export HISTSIZE=NUMBER”whereNUMBERis the number of commands to save, for instance 10000.
- You can change the number of saved commands by setting the environment variable HISTSIZE in your
man PROGRAMwill give you the manual for a specific program or command, if it exists- Example:
man gccwill give open manual/help for the compilergcc, containing flags to the compiler etc. Note that you need to first load a module that has gcc in.
- Example:
More info
- Material from the “Introduction to Linux” course:
Linux Cheat Sheet
written by P. Ojeda.
The information below is the same content as in the PDF file, but with minor changes/updates by B. Brydsö.
Miscellaneous
| Command | Effect | │ | Command | Effect |
|---|---|---|---|---|
| ls | List files in current directory | │ | less FILE | See the content of file FILE |
| ls -lah | List files in human readable format | │ | vim FILE | Edit FILE with vim |
| cd /dir | Change to the directory “dir” | │ | whereis data | Prints out the location of “data” |
| pwd | Your current PATH | │ | tar -cvzf file.tgz FILE | Pack and compress “FILE” |
| rm FILE | Delete FILE | │ | gunzip file.tgz | Uncompress “file.tgz” |
| rm -rf DIR | Delete directory DIR | │ | tar -xvf file.tar | Unpack “file.tar” |
Wildcards
| Wildcard | Meaning |
|---|---|
| * | Means zero or any number of characters. Ex. File* could be File, File2, Fileuiwie, … |
| ? | Means only one character. Ex. File? could be File1, Filex, Fileh, but not File22 |
| [] | Means a range of characters. Ex. File[1-3] could be File1, File2, File3 |
grep
| Command | Meaning |
|---|---|
| grep ‘word’ file | Search for the pattern ‘word’ in ‘file’ |
| grep -rine ‘word’ home | Search for the pattern ‘word’ recursively in the directory /home |
find
| Command | Meaning |
|---|---|
| find /home -name ‘*.dat’ | Find the files in the directory home ending in ‘.dat’ |
| find /home -mtime +60 | Find every file in /home that was modified more than 60 days ago |
pipes
| Command | Meaning |
|---|---|
| | | Take the output of one command as the input of another. Ex. ls |
Secure copy protocol
| Command | Effect |
|---|---|
| scp file user123@kebnekaise.hpc2n.umu.se:/home/u/user123/ | Copy “file” to the home directory of the user “user123” |
Note: vim commands are in ESC mode
| Bash shortcuts | Meaning | │ | vim commands | Meaning |
|---|---|---|---|---|
| ctrl+r | Make a reverse search | │ | :w file.txt | Save file.txt |
| ctrl+a | Go to the beginning of the line | │ | :q! | Exit without saving |
| ctrl+e | Go to the end of the line | │ | :%s/pat1/pat2/g | Replace pattern “pat1” by “pat2” |
| ctrl+w | Delete the previous word | │ | ctrl+v | Start selection |
| ctrl+k | Delete words after cursor | │ | dd | Delete line |
| ctrl+u | Delete current line | │ | x | Delete character |
| ctrl+l | Clean terminal | │ | r | Replace character |
awk
| Command | Meaning |
|---|---|
| awk ‘/gold/ {print $1}’ coins.txt | Search for pattern “gold” in the file coins.txt and print first column |
Batch jobs
| Command | Effect |
|---|---|
| sbatch job.sh | Launch “job.sh” to the queue |
| squeue -u user123 | Check the jobs from the user “user123” |
| scancel JOBID | Remove the job with id “JOBID” from the queue |
| squeue -f JOBID | Check the details about the job with id “JOBID” |
sshfs
| Command | Meaning |
|---|---|
| sshfs user123@kebnekaise.hpc2n.umu.se /dir1/ /local/dir2 | Mount /dir1 (on Quarry) into your /local/dir2 |
| fusermount -u /local/dir2 | Unmount the /local/dir2 |