Getting started
This is a quickstart guide to using the compute clusters on HPC2N. It is assumed you have accounts at SUPR and HPC2N.
- If you need an overview of what a computer cluster is, read our Beginner’s intro to clusters
- If you would like a short Linux intro, read our Linux guide and Cheat Sheet
- If you need accounts at SUPR or at HPC2N, please read our page about getting User Accounts
Note
The characters $ and b-an01 [~]$ represents the prompt and should not be included in the commands you type.
Logging in to ‘Kebnekaise’
Access to our systems is possible by using SSH. You will need an SSH client for this. There are several options, depending on your operating system. In many cases, using ThinLinc will be the easiest, and this is what we recommend if you do not already have a favourite SSH client.
Password
You will be asked for the temporary password you got from the link in your welcome mail (or else you can get it here).
Note
If this is the first time you are using any of the HPC2N facilities, please change your temporary password immediately after you have logged in.
This is done with the command “passwd” run in a terminal.
- You will first be asked for your current password (the temporary one you got from the above link)
- Then for your new password.
- You will then have to repeat the new password.
- Note Press enter after entering the old password and both instances of the new password.
ThinLinc (all OS)
ThinLinc is a cross-platform remote desktop server developed by Cendio AB. You can access Kebnekaise through ThinLinc. It is especially useful if you need to use software with a graphical interface, but it is also usually faster. You can access Kebnekaise with ThinLinc through either the Web Access desktop or the standalone application.
Web Access desktop
On your local web browser, go to https://kebnekaise-tl.hpc2n.umu.se:300/, this will display the login box

Use your HPC2N username and password to login.
The Web Access version is good if you are using a tablet or do not want to install software on your computer, but there are some features that are not supported.
Standalone application
The full capabilities of ThinLinc can be obtained with the standalone version. In this case you need to download and install ThinLinc. You can get the client from: https://www.cendio.com/thinlinc/download.
Start up the ThinLinc client and login with your HPC2N username and password to the server kebnekaise-tl.hpc2n.umu.se.
For more information on using ThinLinc with HPC2N’s systems, see our ThinLinc connection guide.
Open OnDemand portal
Open OnDemand is a web service that allows HPC users to schedule jobs, run notebooks and work interactively on a remote cluster from any device that supports a modern browser.
You access it by pointing your webbrowser to https://portal.hpc2n.umu.se and logging in with your HPC2N username and password.
For more information on using the Open OnDemand portal at HPC2N, see our Open OnDemand portal guide.
SSH - Linux and macOS
An SSH client is included and you can just open a terminal and then connect. This is how someone with username USERNAME would connect:
You will be asked for the temporary password you got from the link in your welcome mail ( or else you can get it here).
If you need a graphical user interface for anything, we recommend ThinLinc, as it is faster. However, it is also possible to connect with:
Note
If you are using macOS, depending on the version, you may have to install Quartz first.
- For more information on connecting with Linux, see our Linux connection guide.
- For more information on connecting from macOS, see our macOS connection guide.
Windows
An SSH client is not included, so you will need to install one. There are several stand-alone clients, for instance:
though we strongly recommend you use ThinLinc. If you need to use a graphical interface, it will also be easier to use ThinLinc, as you would otherwise have to also install an X11 server, like Xming.
- For information about connecting with ThinLinc, see our ThinLinc tutorial.
- For more information on connecting from Windows, see our Windows connection guide.
Storing your files
As default, you have 25GB in your home directory. If you need more, you can accept the “default storage” you will be offered after applying for compute resources. The default storage is 500GB. Another option is asking for more storage during the project proposal.
Because of the small size of your home directory, we strongly recommend that you acquire and use project storage for your files and data.
You can read more about this in the section about the different filesystems at HPC2N.
Editors
Some of the installed editors are more suited for a GUI environment and some are more suited for a command line environment. If you are using the command line and do not know any of the installed editors, then it is recommended that you use “nano”.
Simple commands for nano
- Starting “nano”: Type nano FILENAME on the command line and press Enter. FILENAME is whatever you want to call your file.
- If FILENAME is a file that already exists, nano will open the file. If it dows not exist, it will be created.
- The editor will look like this:
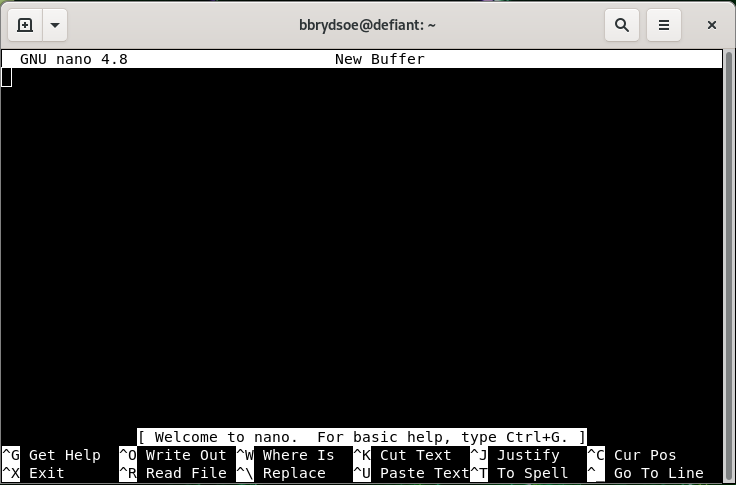
- Note that many of the commands are listed at the bottom
- The ^ before the letter-commands means you should press CTRL and then the letter (while keeping CTRL down).
- Your prompt is in the editor window itself, and you can just type (or copy and paste) the content you want in your file.
- When you want to exit (and possibly save), you press CTRL and then x while holding CTRL down (this is written CTRL-x or ^x).
- nano will ask you if you want to save the content of the buffer to the file. After that it will exit.
More information about installed editors at HPC2N’s systems can be found in the section “Editors” in the Linux guide.
Accessing software applications (the module system)
HPC2N are using a set of tools called EasyBuild and Lmod to install and manage software packages and their accompanying modules.
Modules are
- used to setup your environment (paths to executables, libraries, etc.) for using a particular (set of) software package(s)
- a tool to help users manage their Unix/Linux shell environment, allowing groups of related environment-variable settings to be made or removed dynamically
- a way to allow having multiple versions of a program or package available by just loading the proper module
- installed in a hierarchial layout. This means that some modules are only available after loading a specific compiler and/or MPI version.
Important commands
- ml lists the currently loaded modules, and is equivalent with module list
- ml spider lists all software modules. Same as module spider
- ml spider SOFTWARE searches (case-insensitive) for SOFTWARE in the whole module hierarchy (same as module spider SOFTWARE)
- ml spider SOFTWARE/VERSION shows information about the module SOFTWARE/VERSION including prerequisite modules
- ml SOFTWARE/VERSION loads the SOFTWARE/VERSION module, and is equivalent with module load SOFTWARE/VERSION
- ml -SOFTWARE unloads the currently loaded SOFTWARE module, and is equivalent with module unload SOFTWARE
- ml av prints the currently available modules (with what is currently loaded), and is equivalent with module avail
- ml purge Unload all modules except the “sticky” modules (snicenvironment and systemdefault modules which defines some important environment variables). Equivalent to module purge
Example
Gromacs
Find available versions
Check how to load a specific version (here GROMACS/2019.4-PLUMED-2.5.4)
Load the CUDA-enabled version of the above (from the previous command you learn that the prerequisites are GCC/8.3.0 CUDA/10.1.243 OpenMPI/3.1.4)
For more information about the module system, see the section “The module system”.
Compiling and linking with libraries
Both Intel and GCC compiler suites are installed on Kebnekaise, and there are C, C++, Fortran 77, Fortran 90, and Fortran 95 compilers available for both.
Remember
You always need to load a compiler or compiler toolchain (contains a compiler and various libraries depending on which toolchain it is: MPI, BLAS, LAPACK…) before compiling and linking.
Hint
After loading a compiler/compiler toolchain, you could load buildenv. This gives you access to a large number of environment variables that makes it easier to link.
Example: Loading the foss/2021b compiler toolchain and the matching buildenv
Note
Sometimes buildenv has not been installed for all versions of the compiler toolchain. If you find there is no buildenv for the compiler/compiler toolchain you wish to use, contact us at support@hpc2n.umu.se and ask to have it installed.
Compiling with GCC
| Language | Compiler name | MPI |
|---|---|---|
| Fortran77 | gfortran | mpif77 |
| Fortran90 | gfortran | mpif90 |
| Fortran95 | gfortran | N/A |
| C | gcc | mpicc |
| C++ | g++ | mpiCC |
Remember
You need to load a compiler toolchain which has the MPI libraries included in order to use mpi*
Example: compiling a regular C program
This results in the executable a.out.
Example: compiling a regular C program and naming the output
where you change MYEXECUTABLE to whatever you want the output named.
Note
More information about compiling, flags, and linking can be found in the section about Compiling.
Compiling with Intel
| Language | Compiler name | MPI |
|---|---|---|
| Fortran77 | ifort | mpiifort |
| Fortran90 | ifort | mpiifort |
| Fortran95 | ifort | N/A |
| C | icc | mpiicc |
| C++ | icpc | mpiicc |
Remember
You need to load a compiler toolchain which has the MPI libraries included in order to use mpi*
Example: compiling an MPI C program
Note
More information about compiling, flags, and linking can be found in the section about Compiling.
The Batch System (SLURM)
The batch system on Kebnekaise is, like on most Swedish HPC centres, handled through SLURM.
SLURM is an Open Source job scheduler, which provides three key functions:
- Keeping track of available system resources
- Enforcing local syste, resource usage and job scheduling policies
- Managing a job queue and distributing work across resources according to policies
Warning
Large, long, and/or parallel jobs must be run through the batch system.
Info
A set of computing tasks submitted to a batch system is called a job. Jobs can be submitted in two ways:
- From a command line
- Using a job script.
We recommend using a job script as it makes troubleshooting easier and also allows you to keep track of batch system parameters you used in the past.
To run a batch job, you need to:
- create a SLURM batch script
- submit it
SLURM batch scripts can also be called batch submit files, SLURM submit files, or job scripts.
To create a new batch script:
- Open a new file in your chosen editor (nano, emacs, vim, …)
- Write a batch script including SLURM batch system directives
- Remember to load any modules you may need
- Save the file
- Submit the batch script to the batch system queue using the command sbatch
Batch system directives
Batch system directives start with #SBATCH. The very first line (#!/bin/bash) says that the Linux shell bash will be used to interpret the job script. Since it is the only one compatible with the batch system, this should always be there.
Here are some of the most common directives:
- -A specifies the local/NAISS project ID formated as hpc2nXXXX-YYY or NAISSXXXX-YY-ZZ (mandatory; spaces and slashes are not allowed in the project ID. The letters can be upper or lower case though)
- -N the number of nodes that slurm should allocate for your job. This should only be used together with
–ntasks-per-nodeor with–exclusive. But in almost every case it is better to let slurm calculate the number of nodes required for your job, from the number of tasks, the number of cores per task, and the number of tasks per node. - -J is a job name (default is the name of the submit file)
- --output=OUTPUTFILE and --error=ERRORFILE specify paths to the standard output file (OUTPUTFILE) and standard error files (ERRORFILE), named as you see fit. The default is that both standard out and error are combined into the file
slurm-JOBID.out, where JOBID is the job-id of the job. If you name your output files or error files it is a good idea to add the variable%J(contains the current job-id) as it will ensure your previous files do not get overwritten. - -n specifies requested number of tasks. The default is one task.
- --time=HHH:MM:SS is the real time (as opposed to the processor time) that should be reserved for the job. Max is 168 hours. HHH is hours, MM is minutes, and SS is seconds. It can also be written in short form as -t HHH:MM:SS.
- -c specifies requested number of cpus (actually cores) per task. Request that ncpus be allocated per task. This can be useful if the job is multi-threaded and requires more than one core per task for optimal performance. It can also be used to get more memory than is available on one core. The default is one core per task.
- --exclusive requests the whole node exclusively for this job.
- --gres=gpu:CARDTYPE:x where CARDTYPE is v100 or a100 and x is 1 or 2. This is used to request GPU resources. In case of A100 cards you also need to add -p amd_gpu.
- By default your job’s working directory is the directory you start the job in.
- Before running the program it is necessary to load the appropriate module(s) for various software or libraries.
- Generally, you should run your parallel program with
srununless the program handles parallelization itself.
Batch system commands
In the examples below, the SLURM batch script will be called JOBSCRIPT. You can call it anything you like. Traditionally, they have the extension .sh or .batch, but it is optional.
We refer to the job-id (given as JOBID in the commands - change to the actual one) several times below. It is a unique id given to the job when it is submitted. It will be returned when the job is submitted and can also be found with the command squeue (more information below).
Submit job
Get a list of your jobs
USERNAME should be changed to your username. This output list will contain the job-ids as well.
Check on a specific job with job-id JOBID
Delete a specific job with job-id JOBID
Delete all the jobs belonging to the user with username USERNAME
Note: you can only delete your own jobs.
Get a url with graphical info about a job with job-id JOBID
Batch system miscellaneous info
- Output and errors for a job with job-id JOBID will per default be sent to a file named
slurm-JOBID.out - To split output and error files use these flags in the submit script (and name ERRORFILE and OUTPUTFILE as you want - it is recommended to include the variable
%Jin the name, as that will ensure new files are created each run instead of overwriting the existing files) - To run on the largemem nodes (if you have access to this resource) add this to your submit script
- To constrain the nodes you run on to Intel Skylake CPUs, add this
- Using the GPU nodes on Kebnekaise
where CARDTYPE is v100 or a100 and x = 1 or 2.
NOTE: for A100 you also need to add the partition#SBATCH -p amd_gpu
More information about batch scripts and the batch system can be found in the Batch System section.
Example job scripts
Change hpc2nxxxx-yyy to your actual project account number.
Serial job script
#!/bin/bash
#SBATCH -A hpc2nxxxx-yyy
#SBATCH -n 1
# Asking for 5 minutes
#SBATCH --time=00:05:00

# Load modules as needed. This loads foss version 2021b, which
# is GCC, OpenMPI, OpenBLAS/LAPACK, FFTW, and ScaLAPACK
module load foss/2021b

# Run your program
./my-program
MPI job script
#!/bin/bash
#SBATCH -A hpc2nXXXX-YYY
#SBATCH -n 14
#SBATCH --time=00:05:00
##SBATCH --exclusive

module purge > /dev/null 2>&1
ml foss/2021b

srun ./my parallel program
The --exclusive flag means your job will not share the node with any other job (including your own). It is commented out in the above example, but you can remove one of the #’s to activate it if you, for instance, need the entire bandwidth of the node.
More
There are more example batch scripts in the Basic examples of job submission files section under the main batch system documentation.